Cobbler是一套快速搭建网络自动化安装操作系统的软件,个人感觉是PXE的升级版;提供cli和web两种管理方式,还提供API接口
系统环境:
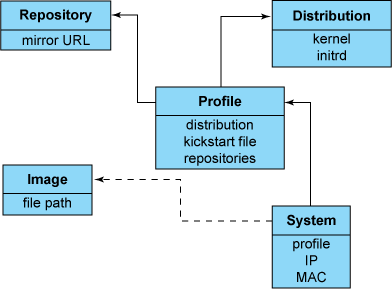
Cobbler对象类型 发行版(distro) :表示一个操作系统。它承载了内核和 initrd 的信息,以及内核参数等其他数据。配置文件(profile) :包含一个发行版、一个 kickstart 文件以及可能的存储库,还包含更多特定的内核参数等其他数据。系统(system) :表示要配给的机器。它包含一个配置文件或一个镜像,还包含 IP 和 MAC 地址、电源管理(地址、凭据、类型)以及更为专业的数据等信息。存储库(repository) :保存一个 yum 或 rsync 存储库的镜像信息。镜像(image) :可替换一个包含不属于此类别的文件的发行版对象(例如,无法分为内核和 initrd 的对象)。
Cobbler安装 安装系统扩展包 安装后报错可以参考http://islocal.cc/2017/04/06/yum-安装epel扩展后报错/
1 yum -y install epel-release
安装需要的其他组件 1 yum -y install rsync tftp httpd pykickstart xinetd
安装cobbler程序包和fence代理包 fence代理包是执行电源管理活动的
1 yum -y install cobbler fence-agents
启动cobbler 服务 1 systemctl start cobblerd httpd
检查配置文件
Q1:修改cobbler服务器地址 Q2:修改dhcp服务器地址 1 next_server: 192.168.6.103
Q3:修改/etc/selinux/config配置 Q4:修改/etc/xinetd.d/tftp 配置 Q5:下载需要的网络引导文件 Q6:启动并设置开机启动rsyncd服务 1 2 systemctl start rsyncd.service systemctl enable rsyncd.service
Q7:这个是基于debian操作系统的错误 centos系统下忽略,不予处理
Q8:修改安装系统后默认的root密码为’ffffff’ 1 2 3 openssl passwd -1 -salt 'random123' 'ffffff' vim /etc/cobbler/settings default_password_crypted: "$1$random12$KuDtGsOHnRfzasr7D4qI40"
配置Cobbler 编辑主配置文件 vim /etc/cobbler/settings
1 2 3 4 5 6 7 8 manage_dhcp: 1 manage_dns: 1 manage_tftpd: 1 restart_dns: 1 restart_dhcp: 1 pxe_just_once: 1 next_server: <dhcp服务器地址,即本机> server:<cobbler 服务器地址>
以上部分选项之前已经配置或者默认选项已符合要求manage cobbler 可以管理服务restart cobbler 可以重启服务pxe_just_once 预防将机器中的安装循环配置为始终从网络引导。激活此选项时,机器告诉 Cobbler 安装已完成
指定cobbler管理服务使用的程序 vim /etc/cobbler/modules.conf
1 2 3 4 5 6 [dns] module = manage_dnsmasq [dhcp] module = manage_dnsmasq [tftpd] module = manage_in_tftpd
配置dhcp服务 使用dnsmasq提供dns和dhcp服务
通常,您希望阻止未注册的客户端从服务器引导。为此,添加参数 dhcp-ignore=tag:!known。(在以前的版本中,语法可能有所不同:dhcp-ignore=#known。如果有疑问,您可以同时插入两个版本。)
vim /etc/cobbler/dnsmasq.template
1 dhcp-range=192.168.6.200,192.168.6.210,255.255.255.0
同步cobbler数据 重启服务 1 systemctl restart httpd cobblerd xinetd rsyncd dnsmasq
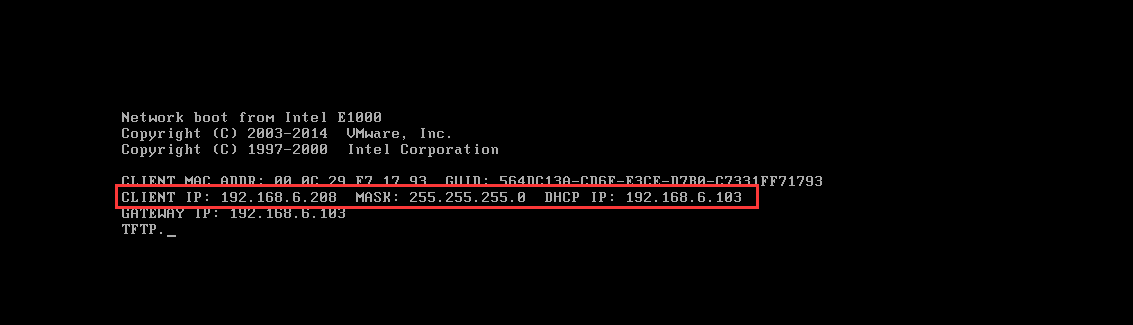
客户机从网络启动,可以看到已经可以获取到ip地址了
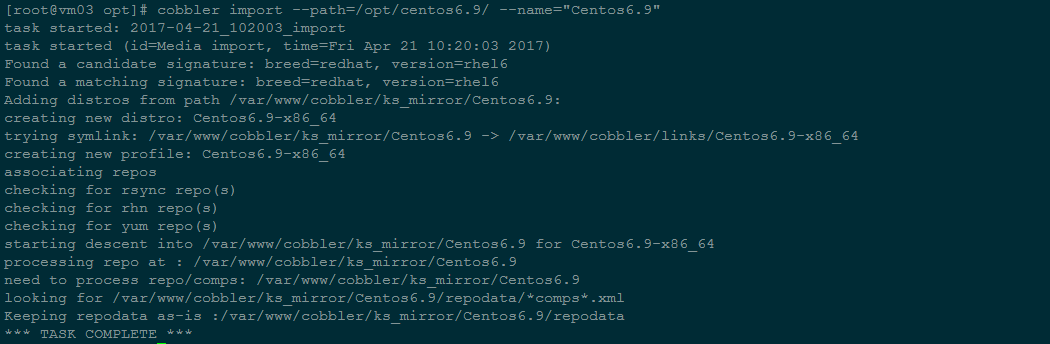
创建操作系统 创建一个发行版本 1 2 3 mkdir /opt/centos6.9/ mount -o loop /opt/CentOS-6.9-x86_64-bin-DVD1.iso /opt/centos6.9/ cobbler import --path=/opt/centos6.9/ --name="Centos6.9"
查看发行版本 1 2 cobbler distro list cobbler distro report
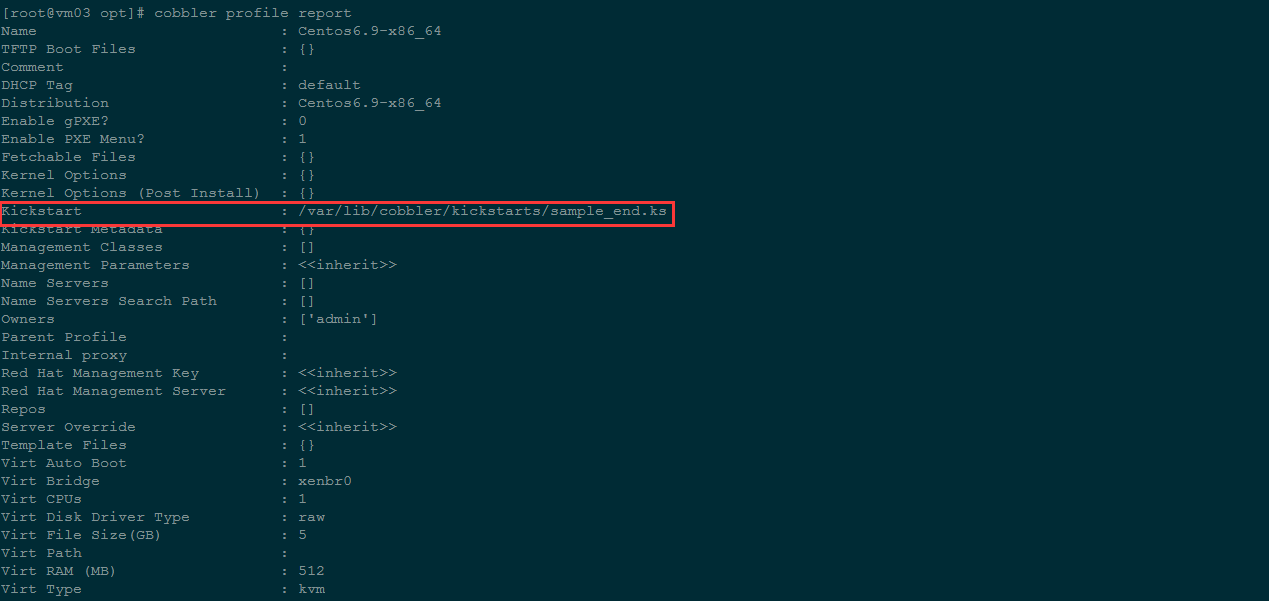
查看配置文件 可以看到这里默认的ks文件是sample_end.ks
1 2 cobbler profile list cobbler profile report
使用自定义ks文件 使用图形化system-config-kickstart工具创建ks文件 使用系统生成的ks文件模板修改1 2 3 4 5 6 7 8 9 10 11 12 13 14 15 16 17 18 19 20 21 22 23 24 25 26 27 28 29 30 31 32 33 34 35 36 37 38 39 40 41 42 43 44 45 46 47 48 49 50 51 52 53 54 55 56 57 58 59 60 61 62 63 64 65 66 67 68 69 70 71 72 73 74 75 76 77 78 79 80 81 82 # kickstart template for Fedora 8 and later. # (includes %end blocks) # do not use with earlier distros #platform=x86, AMD64, or Intel EM64T # System authorization information auth --useshadow --enablemd5 # System bootloader configuration bootloader --location=mbr # Partition clearing information clearpart --all --initlabel # Use text mode install text # Firewall configuration firewall --disable # Run the Setup Agent on first boot firstboot --disable # System keyboard keyboard us # System language lang en_US # Use network installation url --url=$tree # If any cobbler repo definitions were referenced in the kickstart profile, include them here. $yum_repo_stanza # Network information $SNIPPET('network_config') # Reboot after installation reboot #Root password rootpw --iscrypted $default_password_crypted # SELinux configuration selinux --disabled # Do not configure the X Window System skipx # System timezone timezone Asia/Shanghai # Install OS instead of upgrade install # Clear the Master Boot Record zerombr # Allow anaconda to partition the system as needed autopart %pre $SNIPPET('log_ks_pre') $SNIPPET('kickstart_start') $SNIPPET('pre_install_network_config') # Enable installation monitoring $SNIPPET('pre_anamon') %end %packages $SNIPPET('func_install_if_enabled') @base @development %end %post --nochroot $SNIPPET('log_ks_post_nochroot') %end %post $SNIPPET('log_ks_post') # Start yum configuration $yum_config_stanza # End yum configuration $SNIPPET('post_install_kernel_options') $SNIPPET('post_install_network_config') $SNIPPET('func_register_if_enabled') $SNIPPET('download_config_files') $SNIPPET('koan_environment') $SNIPPET('redhat_register') $SNIPPET('cobbler_register') # Enable post-install boot notification $SNIPPET('post_anamon') # Start final steps $SNIPPET('kickstart_done') # End final steps %end
添加一个profile 1 2 cobbler profile add --distro="Centos6.9-x86_64" --name=centos6.9_customized \ --kickstart=/var/lib/cobbler/kickstarts/CentOS6.9_cust.cfg
修改已有的profile 1 cobbler profile edit --name=centos6.9_customized --kickstart=/var/lib/cobbler/kickstarts/CentOS6.9_cust.cfg
添加第三方yum仓库 这一步好像有点问题会报错,网上资料说这是一个bug
1 2 3 cobbler repo add --name=163mirrors --mirror=http://mirrors.163.com/centos/6.9/os/x86_64/ cobbler reposync cobbler repo report
将仓库文件与配置文件(profile)关联起来
1 cobbler profile edit --name=Centos6.9-x86_64 --repos=163mirros
安装web管理界面 安装cobbler-web包 1 yum -y install cobbler-web
Cobbler Web 界面的身份验证和授权配置 /etc/cobbler/modules.conf
1 2 3 [authentication] module = authn_pam [authorization] = authz_ownership
新建系统账号并设置密码 1 2 useradd cobbler echo "cobbler" | passwd --stdin cobbler
添加用户到管理组 vim /etc/cobbler/users.conf
1 2 [admins] admin = "cobbler"
重启服务 1 systemctl restart cobblerd httpd
使用https url访问 https://192.168.6.103/cobbler_web
1 2 user:cobbler passwd:cobbler
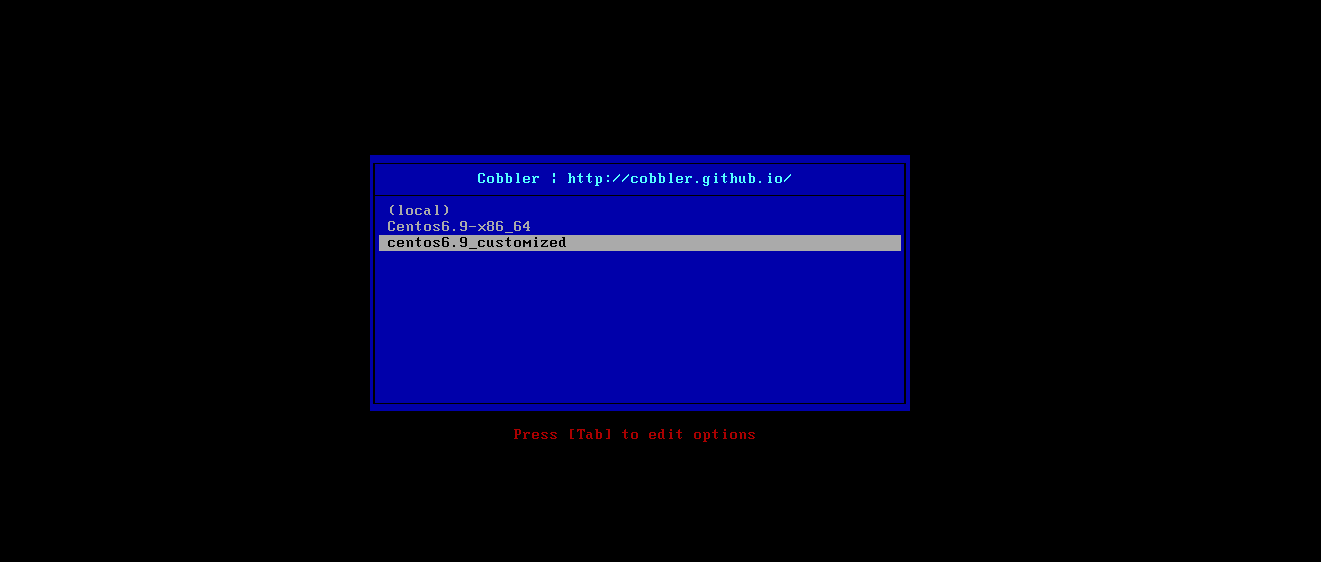
安装操作系统 开机 选择从网络引导,dhcp获取ip地址 选择profile,通过tftp获取引导内核文件 调用ks文件进行无人值守安装操作系统 重装操作系统 这个是针对已经安装操作系统的服务器进行重新安装,个人感觉这种方式除了不用调整从网络启动之外,没看出来比较实用的特性
在客户端机器安装koan软件 1 2 yum -y install epel yum -y install koan
Koan 用法 查看cobbler server 上的profile文件列表
1 koan --server=192.168.6.250 --list=profiles
查看profile详细信息
1 koan --server=192.168.6.250 --display --profile=Centos6.9-x86_64
下次重启时重装操作系统
1 2 koan --server=192.168.6.250 -replace-self --profile=Centos6.9-x86_64 reboot
安装windows操作系统 制作PE iso镜像 下载一个**PE系统 **
创建一个distro 1 cobbler distro add --name="WePe_x64" --kernel=/var/lib/tftpboot/memdisk --initrd=/data/WePE_64_V2.0.iso --kopts="raw iso"
创建空白kickstart文件,并对winPE发行版添加profile 1 2 touch /var/lib/cobbler/kickstarts/WePe_x64.xml cobbler profile add --name=WePe_x64 --distro=WePe_x64 --kickstart=/var/lib/cobbler/kickstarts/WePe_x64.xml
同步cobbler windows 操作系统安装这个,目前只是做了一个网络版的PE,网上有教程说使用samba共享镜像,我这里没有成功,可以参考**这篇文章 **;到这里一个最基本的cobbler自动化安装操作系统的环境就搭建完成了,只是完成了distro和profile部分,后期在学习system部分。
参考资料:https://www.ibm.com/developerworks/cn/linux/l-cobbler/ http://blog.codecp.org/2016/11/02/Centos7部署cobbler/