Ambari 是什么? Ambari 跟 Hadoop 等开源软件一样,也是 Apache Software Foundation 中的一个项目,并且是顶级项目。(http://ambari.apache.org) 目前最新的发布版本是 2.6.2.0;Ambari可以简单的理解为开源的Hadoop生态圈(Hive,Yarn,Hbase,Hive,Sqoop,Kafka,Zookeeper,spark 等)平台的管理软件,具备Hadoop组件的安装、管理、运维等基本功能,提供Web UI进行可视化的集群管理,简化了大数据平台的安装、使用难度。
基础环境配置 资源规划 主机名 IP地址 操作系统 bigdata01.islocal.cc 192.168.6.164 CentOS Linux release 7.4.1708 (Core) bigdata02.islocal.cc 192.168.6.181 CentOS Linux release 7.4.1708 (Core) bigdata03.islocal.cc 192.168.6.183 CentOS Linux release 7.4.1708 (Core) bigdata04.islocal.cc 192.168.6.194 CentOS Linux release 7.4.1708 (Core)
软件版本 JDK 1.8.1.8.0_112
下载地址 首先登陆官方页面https://docs.hortonworks.com/index.html 选择需要的版本 点击installation 选择Install Ambari 选择左侧的Ambari Repositories、HDP Stack Repositories 关闭防火墙和Selinux 关闭防火墙 systemctl stop firewalld.service
禁用防火墙 systemctl disable firewalld.service
1
2
3
4
5
[root@bigdata01 ~]# systemctl status firewalld.service ● firewalld.service - firewalld - dynamic firewall daemon Loaded: loaded (/usr/lib/systemd/system/firewalld.service; disabled; vendor preset: enabled) Active: inactive (dead) Docs: man:firewalld(1)
关闭Selinux 1 2 3 sed -i 's/SELINUX=enforcing/SELINUX=disabled/' /etc/selinux/config grep SELINUX=disabled /etc/selinux/config setenforce 0
查看Selinux状态 1 2 3 4 5 6 7 [root@bigdata01 ~]# sestatus SELinux status: disabled or [root@bigdata01 ~]# getenforce Disabled
新建用户 useradd hadoop && echo "hadoop:hadoop" | chpasswdvisudo
1 2 3 4 5 6 7 8 9 10 11 ## Allow root to run any commands anywhere root ALL=(ALL) ALL hadoop ALL=(ALL) ALL #赋予hadoop用户所有权限 ## Allows members of the 'sys' group to run networking, software, ## service management apps and more. # %sys ALL = NETWORKING, SOFTWARE, SERVICES, STORAGE, DELEGATING, PROCESSES, LOCATE, DRIVERS ## Allows people in group wheel to run all commands %wheel ALL=(ALL) ALL hadoop ALL=(ALL) NOPASSWD: ALL #hadoop用户执行sudo不用输入密码
hadoop用户免密配置 配置bigdata01主机上的hosts [root@bigdata01 ~]# cat /etc/hosts
1 2 3 4 5 6 127.0.0.1 localhost localhost.localdomain localhost4 localhost4.localdomain4 ::1 localhost localhost.localdomain localhost6 localhost6.localdomain6 192.168.6.164 bigdata01.islocal.cc 192.168.6.181 bigdata02.islocal.cc 192.168.6.183 bigdata03.islocal.cc 192.168.6.194 bigdata04.islocal.cc
复制/etc/hosts到其他主机 scp /etc/hosts bigdata02.islocal.cc:/etc/hostsscp /etc/hosts bigdata03.islocal.cc:/etc/hostsscp /etc/hosts bigdata04.islocal.cc:/etc/hosts
配置免密 su - hadoopssh-keygen #默认一路回车
拷贝秘钥到其他主机 ssh-copy-id bigdata01.islocal.ccssh-copy-id bigdata02.islocal.ccssh-copy-id bigdata03.islocal.ccssh-copy-id bigdata04.islocal.cc
测试 ssh bigdata01.islocal.cc datessh bigdata02.islocal.cc datessh bigdata03.islocal.cc datessh bigdata04.islocal.cc date
配置时间同步 如果服务器可以上外网,直接使用公网时间服务器即可yum -y install ntpdatecrontab -e
1 */10 * * * * /usr/sbin/ntpdate cn.ntp.org.cn && hwclock -w
安装JDK 1 2 3 4 5 6 7 8 9 10 11 12 13 14 mkdir /usr/ths tar xf jdk1.8.0_112.tgz -C /usr/ths # 安装jce http://www.oracle.com/technetwork/java/javase/downloads/jce8-download-2133166.html unzip -o -j -q jce_policy-8.zip -d /usr/ths/jdk1.8.0_112/jre/lib/security/ vim /etc/profile export EDITOR=/usr/bin/vim export HISTSIZE=10000 export HISTTIMEFORMAT="%F %T " export JAVA_HOME=/usr/ths/jdk1.8.0_112 export CLASSPATH=.:$JAVA_HOME/lib/dt.jar:$JAVA_HOME/lib/tools.jar source /etc/profile
系统参数优化 vim /etc/security/limits.conf
1 2 * soft nofile 65536 * hard nofile 65536
本地仓库搭建 由于ambari,hdp软件包很大,使用官方的yum源安装比较慢,我们搭建一个本地仓库,使用本地yum源
安装配置web服务器 安装依赖包 yum install gcc gcc-c++ make automake autoconf libtool pcre pcre-devel zlib zlib-devel openssl openssl-devel wget
安装nginx 1 2 3 4 wget http://nginx.org/download/nginx-1.14.0.tar.gz tar xf nginx-1.14.0.tar.gz cd nginx-1.14.0 ./configure --prefix=/usr/ths/nginx-1.14.0/ && make && make install
更换nginx根目录 1 2 3 4 5 6 7 8 9 10 11 12 13 14 mkdir -p /var/www/html/ vim /usr/ths/nginx-1.14.0/conf/nginx.conf ... location / { root /var/www/html; index index.html index.htm; autoindex on; #允许列出目录 } ... #监测配置文件是否正确 cd /usr/ths/nginx-1.14.0/sbin ./nginx -t #启动 ./nginx
解压文件到nginx发布目录下 1 2 3 4 5 mkdir -p /var/www/html/hdp/ tar xf ambari-2.6.2.0-centos7.tar.gz -C /var/www/html/ tar xf HDP-GPL-2.6.4.0-centos7-rpm.tar.gz -C /var/www/html/hdp/ tar xf HDP-UTILS-1.1.0.22-centos7.tar.gz -C /var/www/html/hdp/ tar xf HDP-2.6.4.0-centos7-rpm.tar.gz -C /var/www/html/hdp/
目录结构如下
1 2 3 4 5 6 7 8 9 10 11 12 13 14 15 16 17 18 19 20 21 22 23 24 25 26 [root@bigdata01 ~]# tree -L 4 /var/www/html/ /var/www/html/ ├── ambari │ └── centos7 │ └── 2.6.2.0-155 │ ├── ambari │ ├── ambari.repo │ ├── artifacts.txt │ ├── build.id │ ├── build_metadata.txt │ ├── repodata │ ├── RPM-GPG-KEY │ ├── smartsense │ └── tars └── hdp ├── HDP │ └── centos7 │ └── 2.6.4.0-91 ├── HDP-GPL │ └── centos7 │ └── 2.6.4.0-91 └── HDP-UTILS └── centos7 └── 1.1.0.22 18 directories, 4 files
安装本地源制作相关工具 yum install yum-utils createrepo
编辑repo文件 cat /etc/yum.repos.d/ambari.repo
1 2 3 4 5 #VERSION_NUMBER=2.6.2.0-155 [ambari-2.6.2.0] name=ambari Version - ambari-2.6.2.0 baseurl=http://192.168.6.164/ambari/centos7/2.6.2.0-155/ gpgcheck=0
安装数据库 Ambari支持PostgreSQL 9.1.13+,9.3, 9.4 MariaDB 10.1 MySQL 5.6 Oracle 11gr2 Oracle 12c 等版本数据库,我们这里使用postgres数据库。
创建用户和组 1 2 3 groupadd postgres #新增用户组 useradd -g postgres postgres #新增用户 passwd postgres #为用户设置密码
创建数据目录,并授予权限 mkdir -p /usr/ths/data/PGDATAchown postgres:postgres /usr/ths/data/PGDATAchmod 700 /usr/ths/data/PGDATA
编译安装 1 2 3 4 5 6 7 tar -zxvf postgresql-10.3.tar.gz cd postgresql-10.3 ./configure --prefix=/usr/ths/pgsql-10.3 --without-readline sudo make sudo make install su - postgres /usr/ths/pgsql-10.3/bin/initdb -D /usr/ths/data/PGDATA #初始化配置和数据库
启动 1 2 # -D 为数据文件位置 -l 为日志文件位置(日志文件不存在会自动创建) /usr/ths/pgsql-10.3/bin/pg_ctl start -D /usr/ths/data/PGDATA -l /usr/ths/data/PGDATA/pgsql.log
#可选。 配置环境变量vi cat /etc/profile
1 2 3 export PG_HOME=/usr/ths/pgsql-10.3 export PATH=$PG_HOME/bin:$PATH #注意,环境变量要把:$PATH写在后面,可以避免一些版本冲突问题
配置文件修改 /usr/ths/data/PGDATA/postgresql.conf
pg_hba.conf
1 host all all 192.168.6.1/24 trust
新建ambari数据库 1 2 3 4 5 6 7 8 9 10 11 12 13 su - postgres #进入psql命令行工具 psql #依次执行以下建库建用户语句 CREATE DATABASE ambari; CREATE USER hdp WITH PASSWORD 'solution'; GRANT ALL PRIVILEGES ON DATABASE ambari TO hdp; \connect ambari; CREATE SCHEMA AMBARI AUTHORIZATION hdp; ALTER SCHEMA AMBARI OWNER TO hdp; ALTER ROLE hdp SET search_path to 'AMBARI', 'public'; #退出 \q
执行Ambari的DDL语句
1 2 3 4 5 6 # 以hdp用户,连接ambari库 psql -U hdp -d ambari # 执行DDL语句 \i /var/lib/ambari-server/resources/Ambari-DDL-Postgres-CREATE.sql #执行完毕后,退出 \q
设置Ambari使用的PostgreSQL驱动包 wget https://jdbc.postgresql.org/download/postgresql-42.2.2.jar -O /usr/ths/lib/postgresql-42.2.2.jarambari-server setup --jdbc-db=postgres --jdbc-driver=/usr/ths/lib/postgresql-42.2.2.jar
安装Ambari yum -y install ambari-server
配置Ambari ambari-server setup
1 2 3 4 5 6 7 8 9 10 11 12 13 14 15 #Customize user account for ambari-server daemon [y/n] (n)? y #自定义设置 #Enter user account for ambari-server daemon (postgres): hadoop #Do you want to change Oracle JDK [y/n] (n)? y #是否修改Jdk #Enter choice (1): 3 #输入3 #Path to JAVA_HOME: /usr/ths/jdk1.8.0_112 #设置jdk路径 #Enter advanced database configuration [y/n] (n)? y #是否进入高级数据库设置 #Enter choice (1): 4 #数据库类型4(PostgreSQL) #Hostname (localhost): 192.168.6.164 #数据库地址 #Port (5432): 5432 #数据库端口 #Database name (ambari): ambari #数据库名 #Postgres schema (ambari): ambari #Username (ambari): hdp #数据库用户名 #Enter Database Password (bigdata): solution #数据库密码 #Re-enter password:你的密码 #Proceed with configuring remote database connection properties [y/n] (y)? y
启动ambari-server ambari-server starthttp://192.168.6.164:8080 默认用户名密码: admin/admin
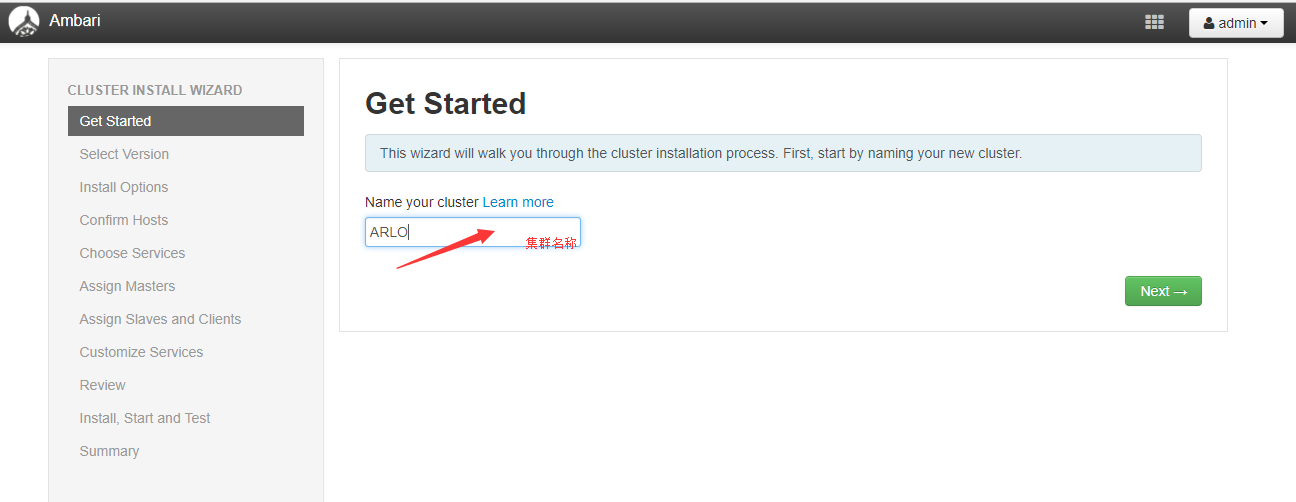
安装HDP集群 点击图中的蓝色按钮“Launch Install Wizard”启动安装向导。
设置HDP集群名称
选择要安装的HDP版本和本地仓库配置
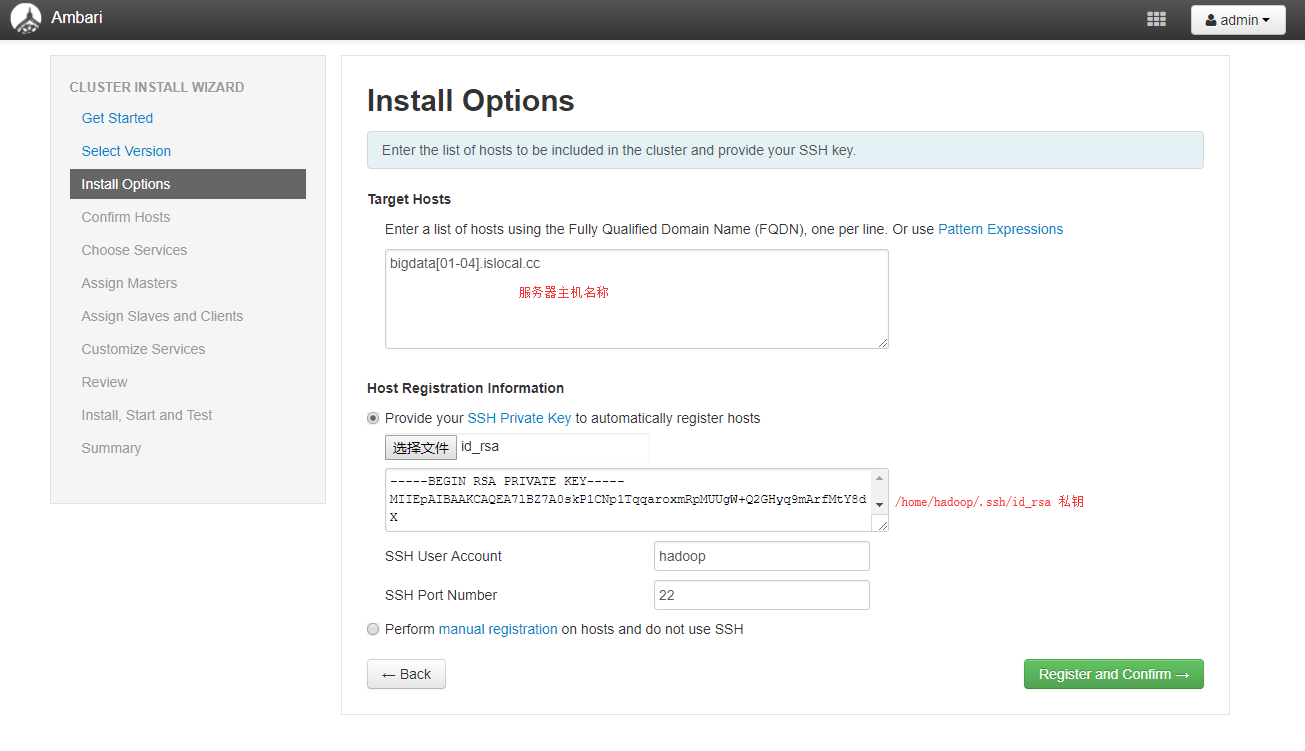
设置ssh私钥 私钥内容为/home/hadoop/.ssh/id_rsa文件内容,可以下载该文件或者直接复制文件内容
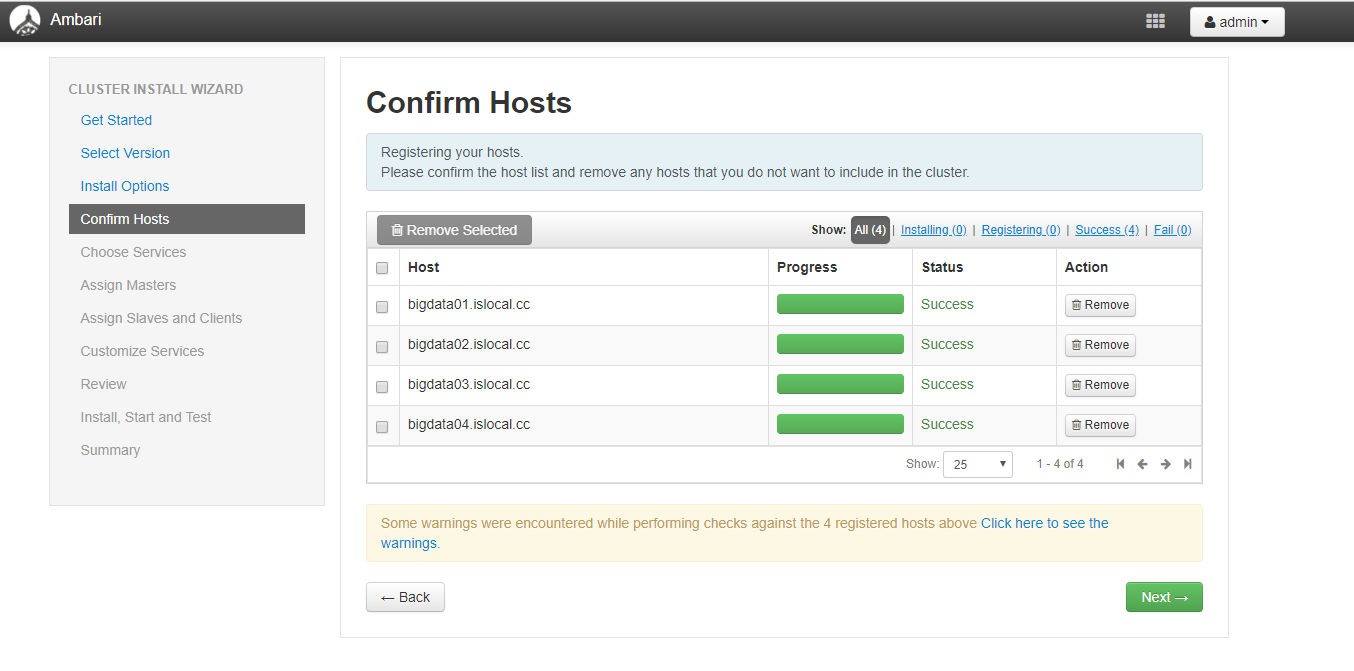
监测ssh免密通信
选择要安装的服务 这里根据自己的安装选择,安装完成后也可以在Services-Action中添加
配置各个服务Master 这里可以在下拉选项里选择调整一下默认的主机设置,保持资源均衡
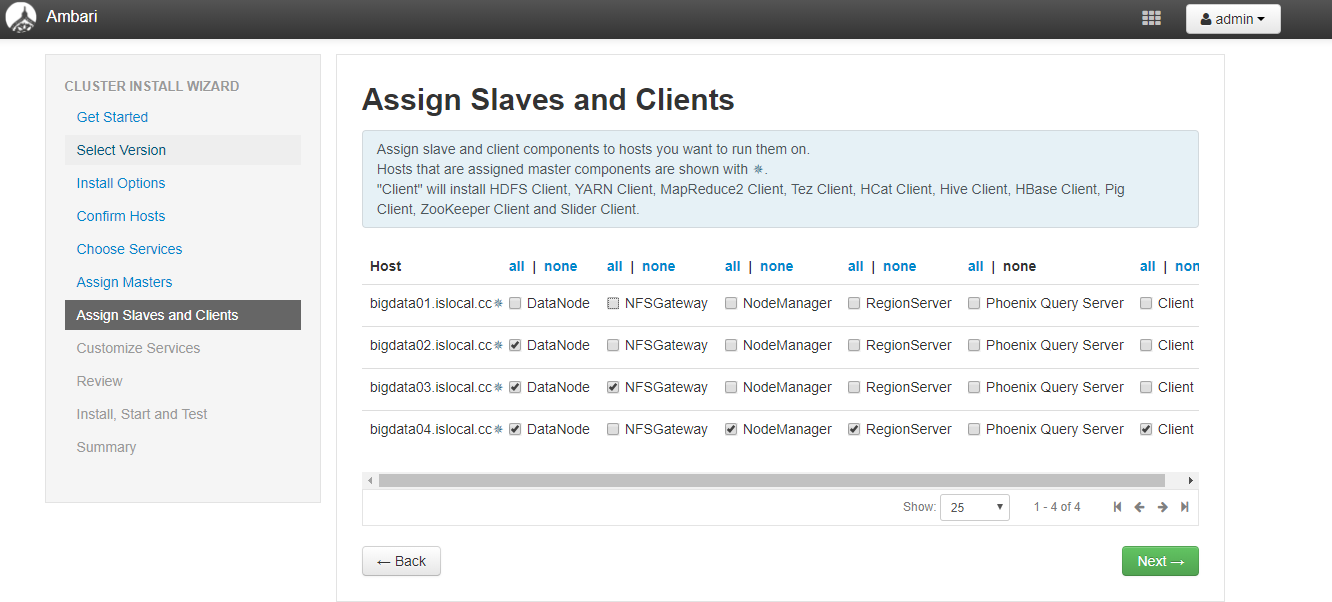
服务的Slaves 和 Clients节配置
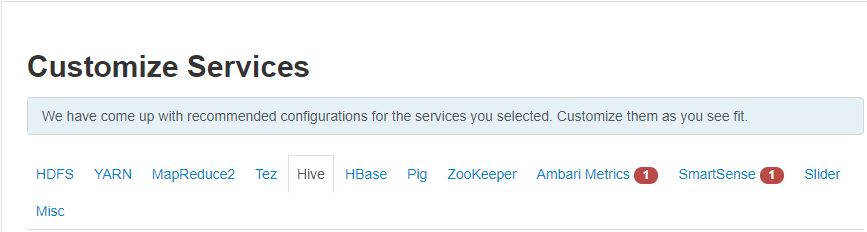
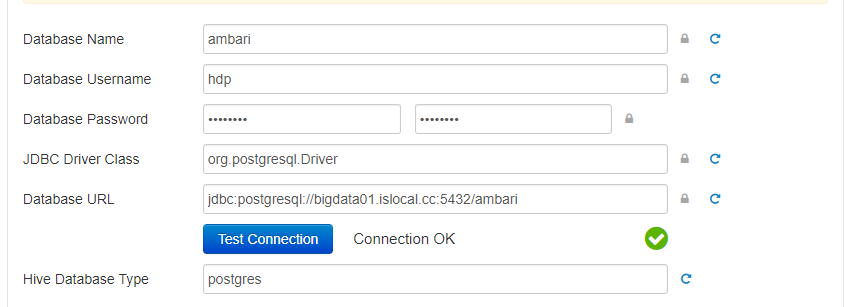
服务器自定义配置 这里一般出现的红色警告都是需要设置密码的地方,手动填一下即可!
1 2 3 4 5 6 7 8 9 10 11 12 13 14 15 16 17 18 19 20 21 22 23 24 25 26 27 28 29 30 31 32 33 34 35 36 37 38 39 40 41 42 43 44 45 46 47 48 49 Admin Name : admin Cluster Name : ARLO Total Hosts : 4 (4 new) Repositories: redhat7 (HDP-2.6): http://192.168.6.164/hdp/HDP/centos7/2.6.4.0-91/ redhat7 (HDP-2.6-GPL): http://192.168.6.164/hdp/HDP-GPL/centos7/2.6.4.0-91/ redhat7 (HDP-UTILS-1.1.0.22): http://192.168.6.164/hdp/HDP-UTILS/centos7/1.1.0.22/ Services: HDFS DataNode : 3 hosts NameNode : bigdata01.islocal.cc NFSGateway : 1 host SNameNode : bigdata02.islocal.cc YARN + MapReduce2 App Timeline Server : bigdata04.islocal.cc NodeManager : 1 host ResourceManager : bigdata04.islocal.cc Tez Clients : 1 host Hive Metastore : bigdata02.islocal.cc HiveServer2 : bigdata02.islocal.cc WebHCat Server : bigdata02.islocal.cc Database : Existing PostgreSQL Database HBase Master : bigdata01.islocal.cc RegionServer : 1 host Phoenix Query Server : 0 host Pig Clients : 1 host ZooKeeper Server : 3 hosts Ambari Metrics Metrics Collector : bigdata03.islocal.cc Grafana : bigdata03.islocal.cc SmartSense Activity Analyzer : bigdata01.islocal.cc Activity Explorer : bigdata01.islocal.cc HST Server : bigdata01.islocal.cc Slider Clients : 1 host
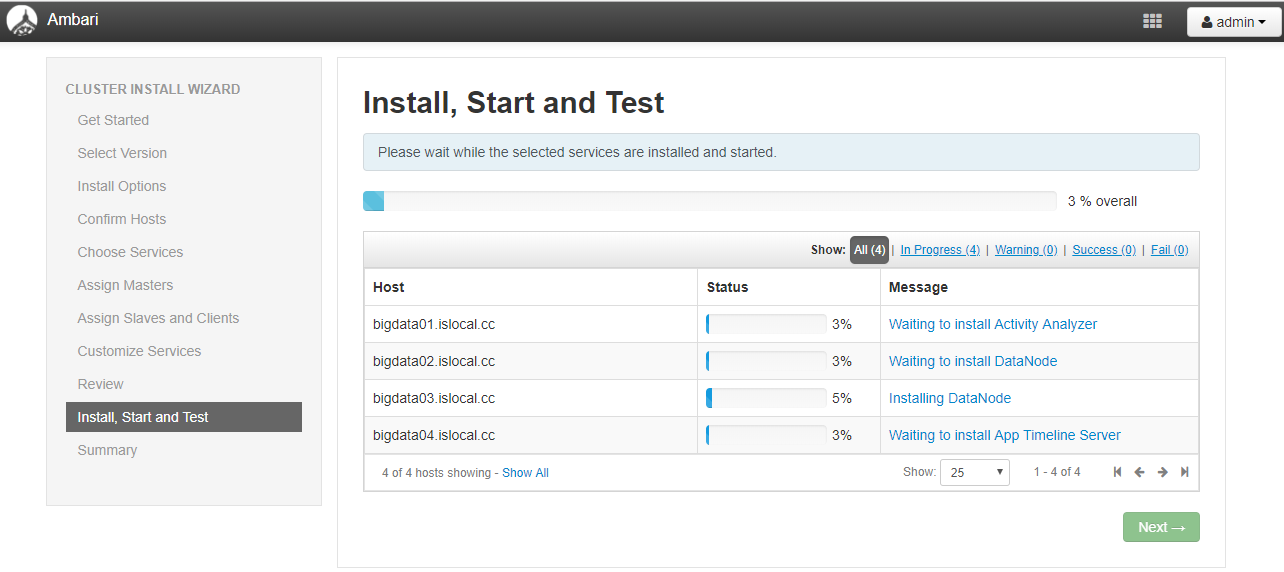
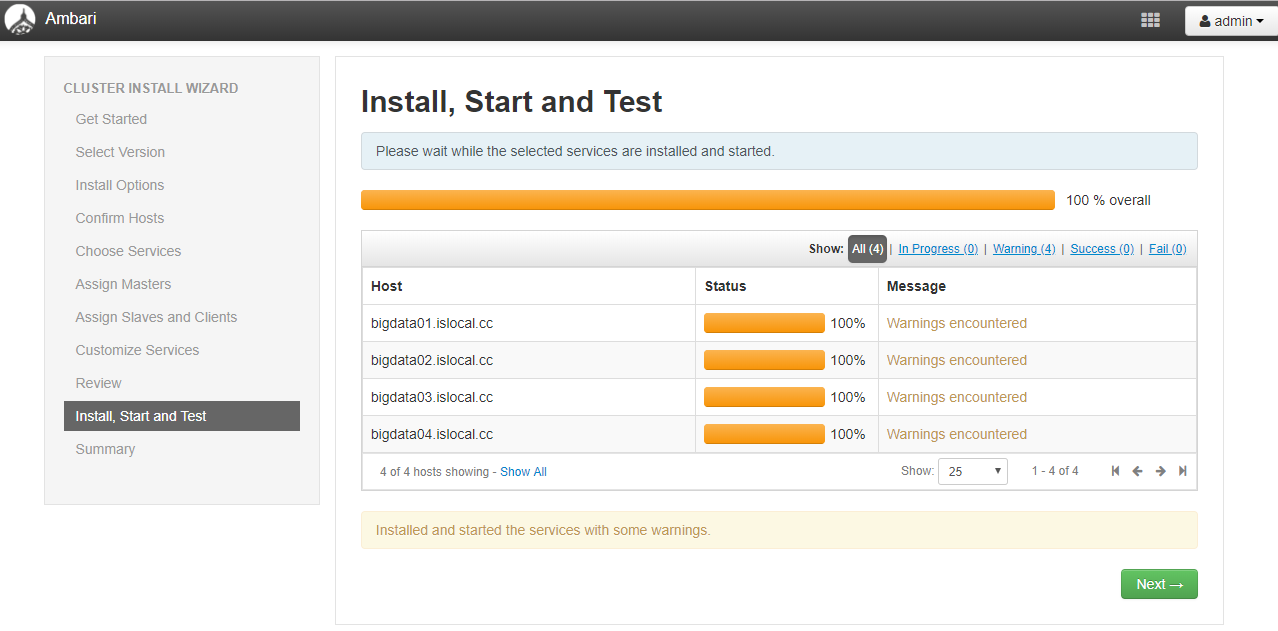
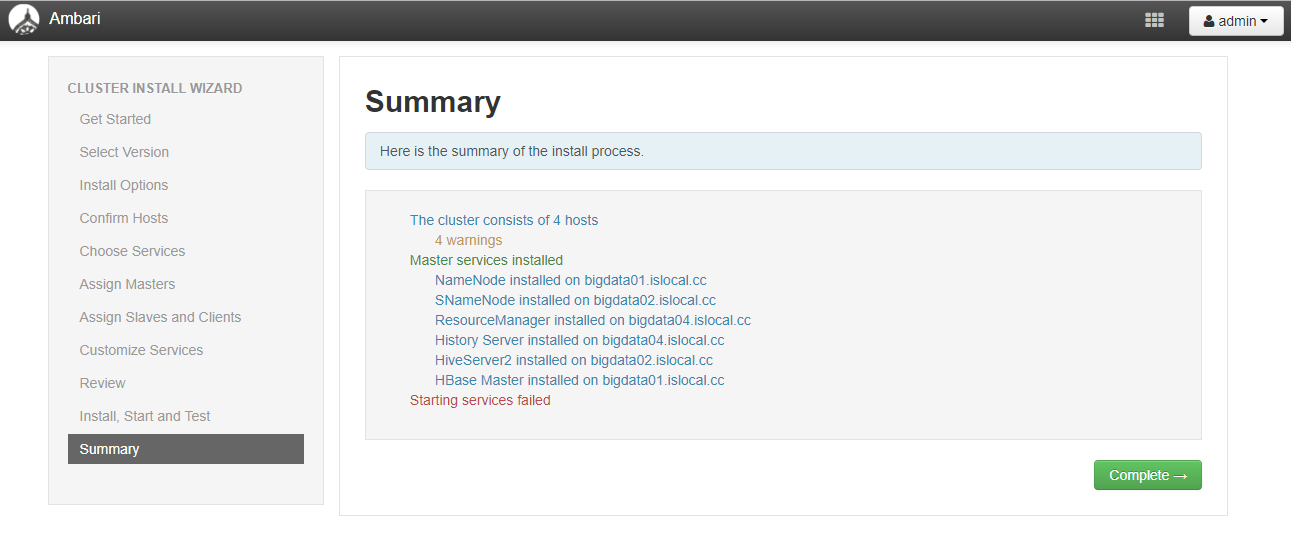
开始安装
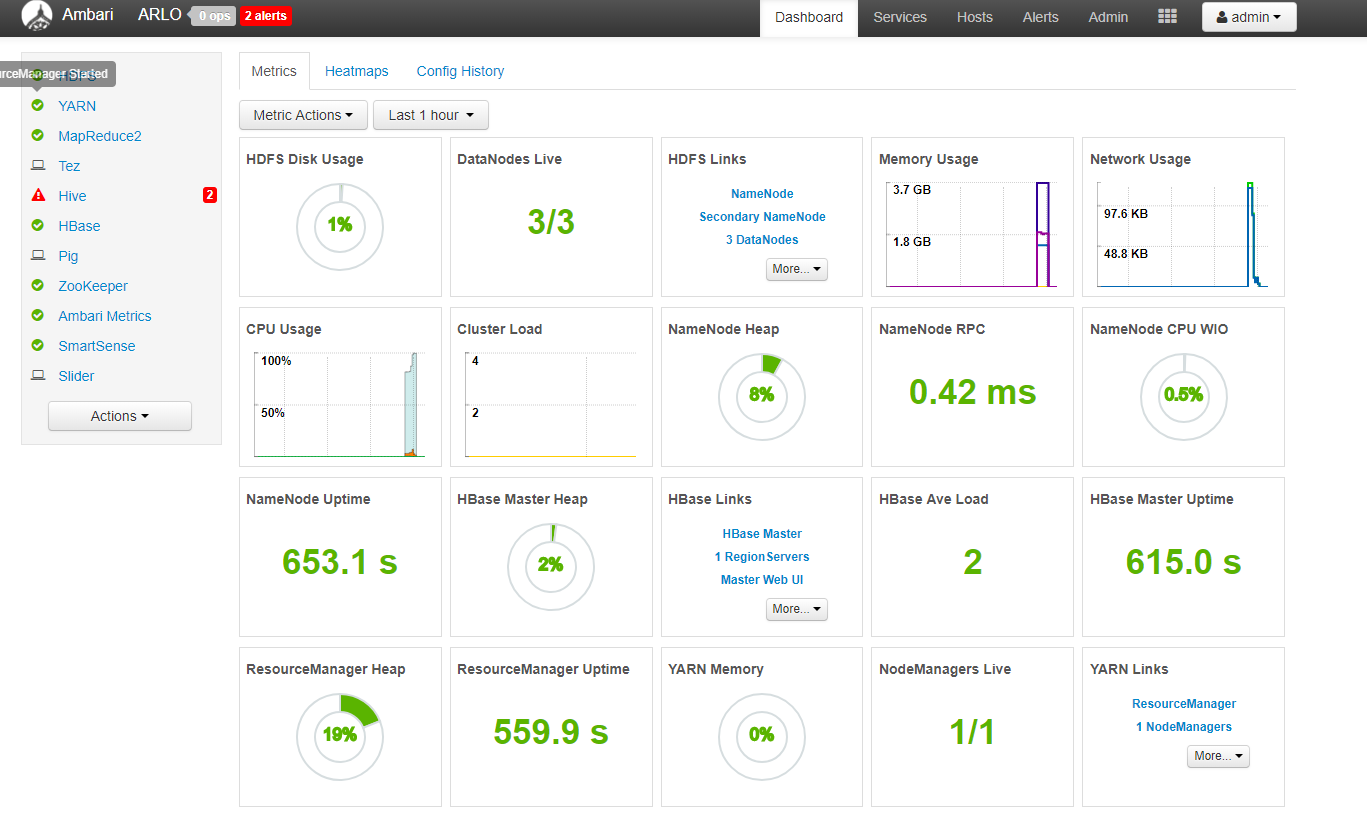
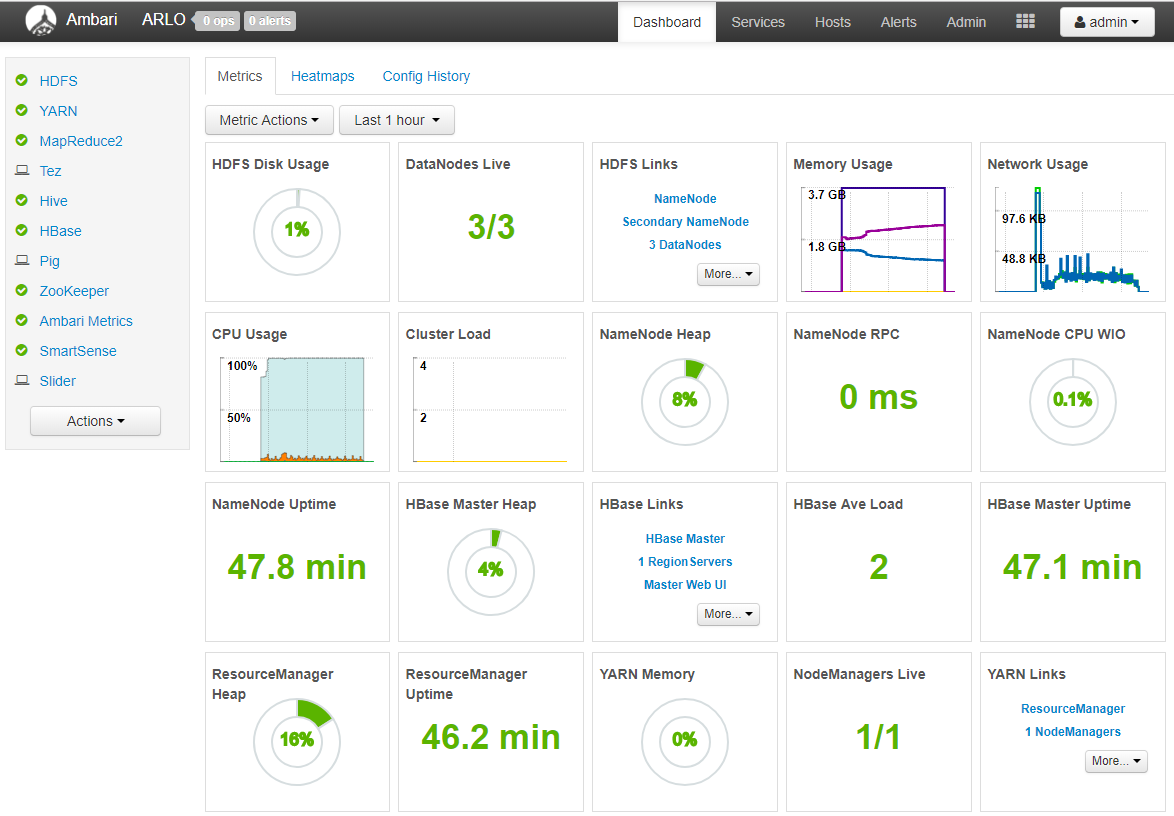
解决完所有告警,效果图如下
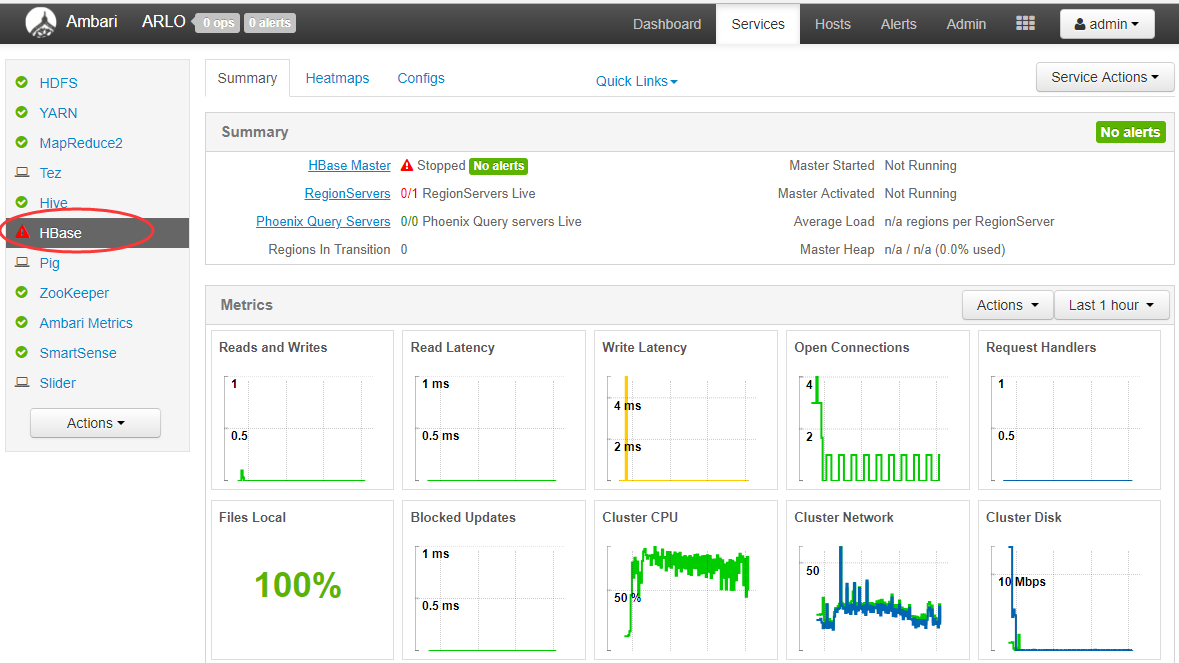
NameNode HA配置 关闭HBase服务 这一步非常重要
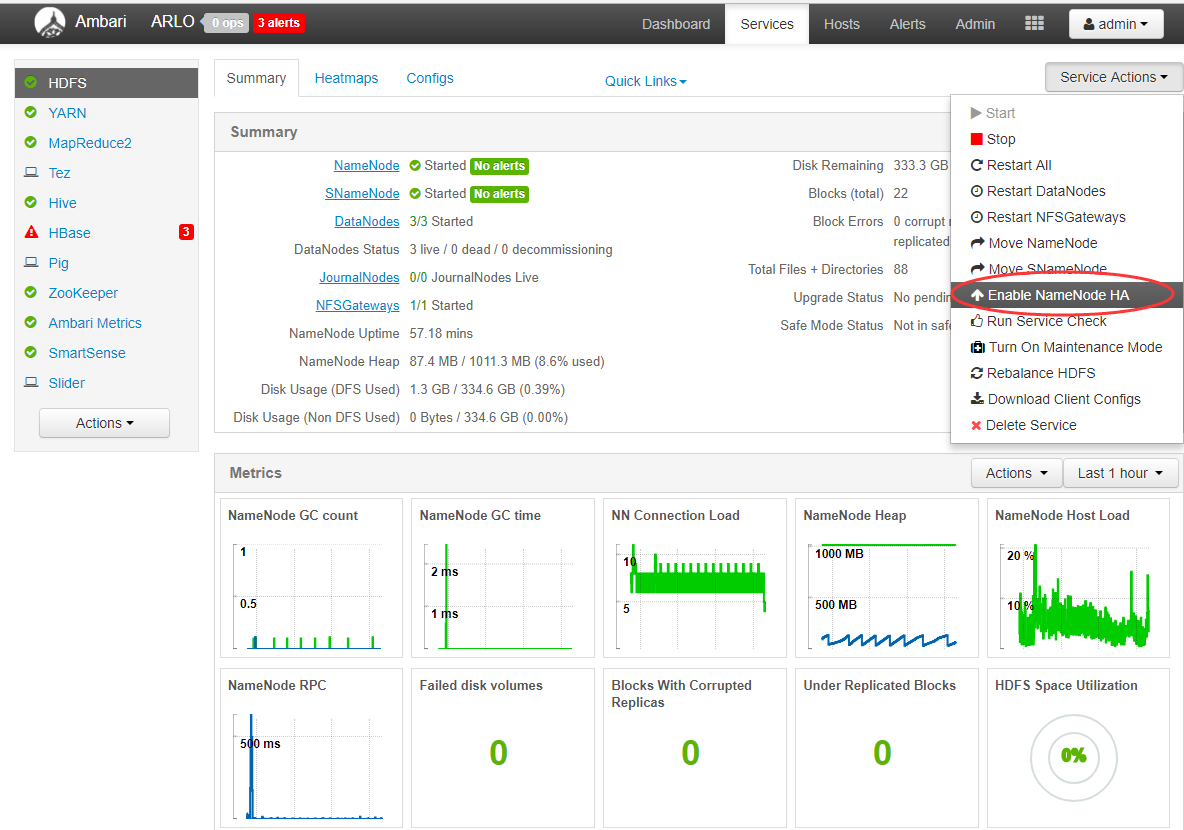
点击Services-HDFS-Enable NameNode HA
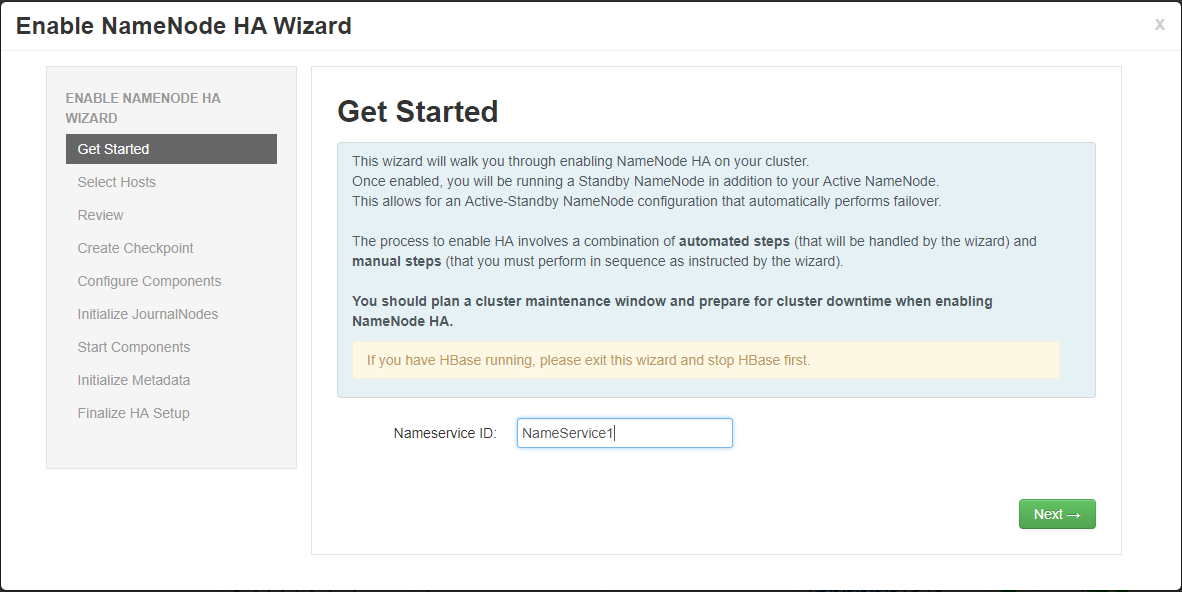
输入Nameservice ID
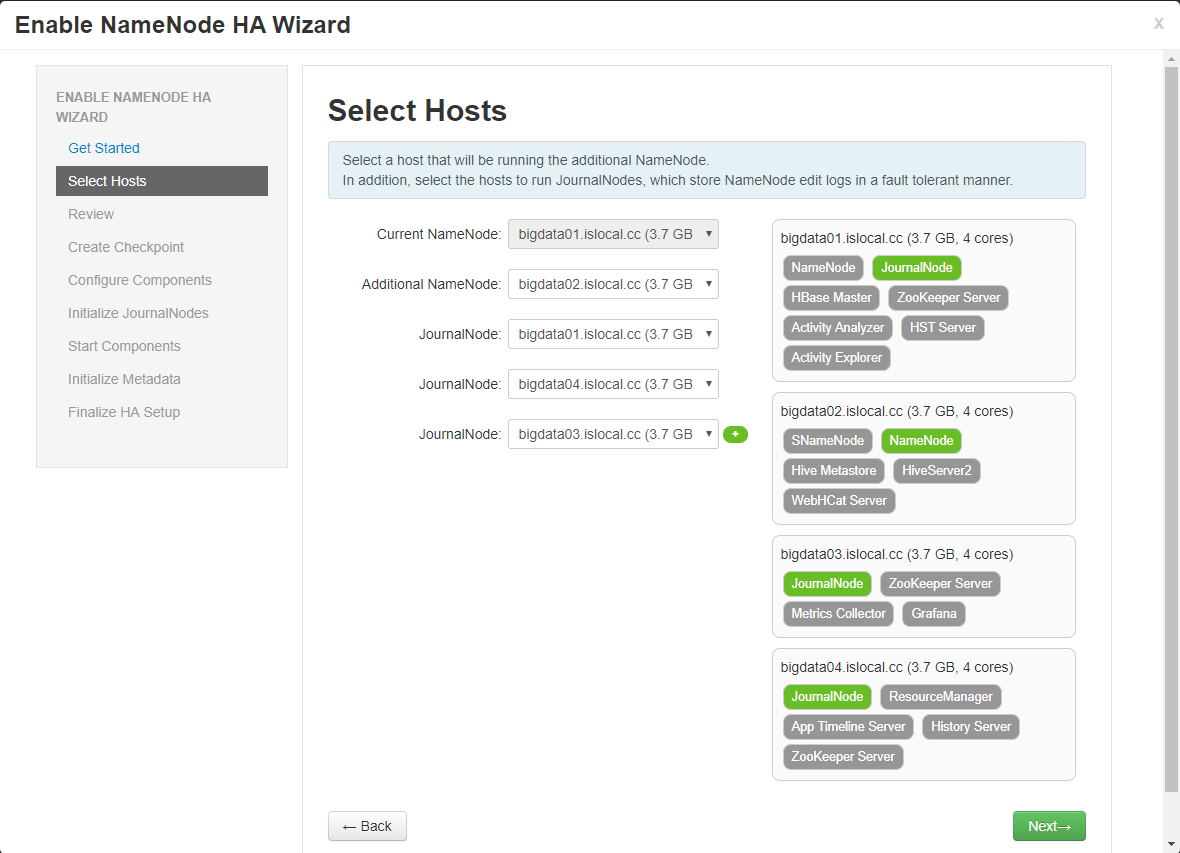
选择要安装的主机
默认即可
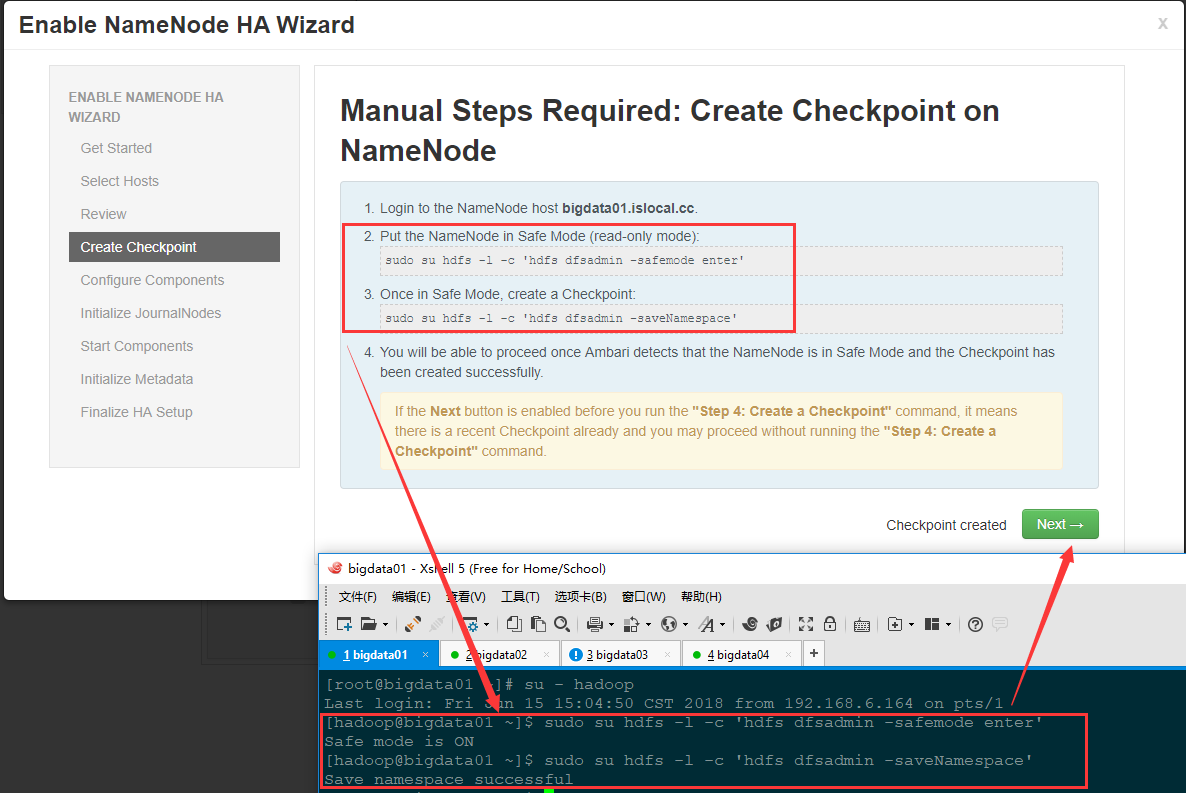
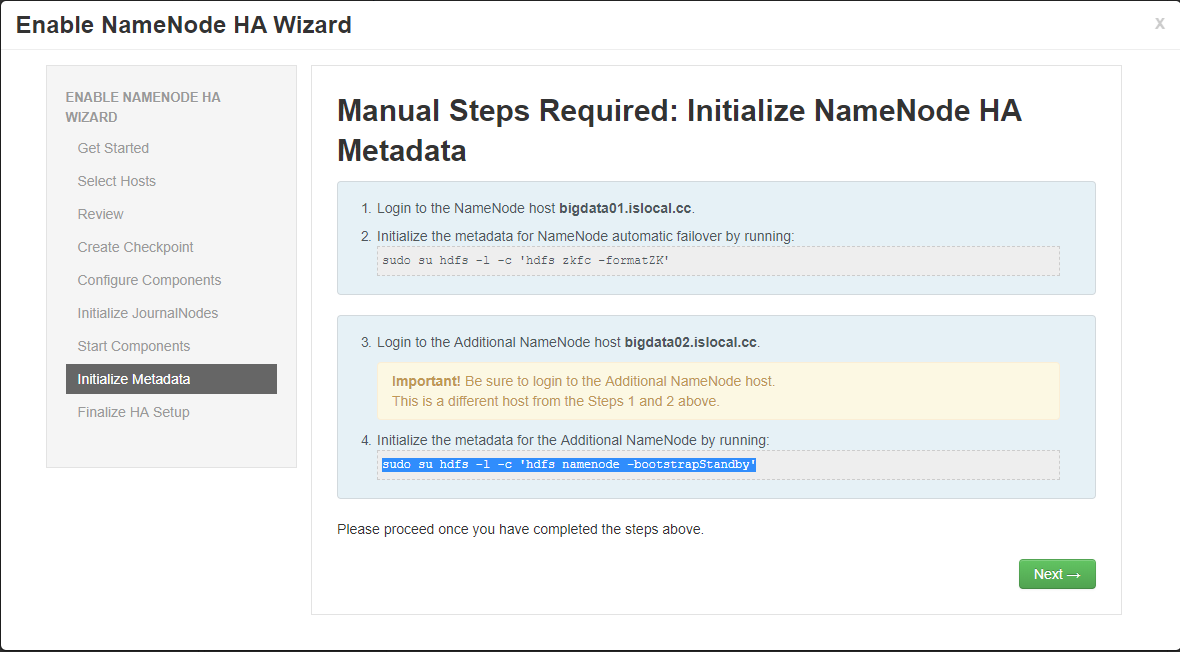
根据提示登录到对应主机上执行提示命令 如下图所示
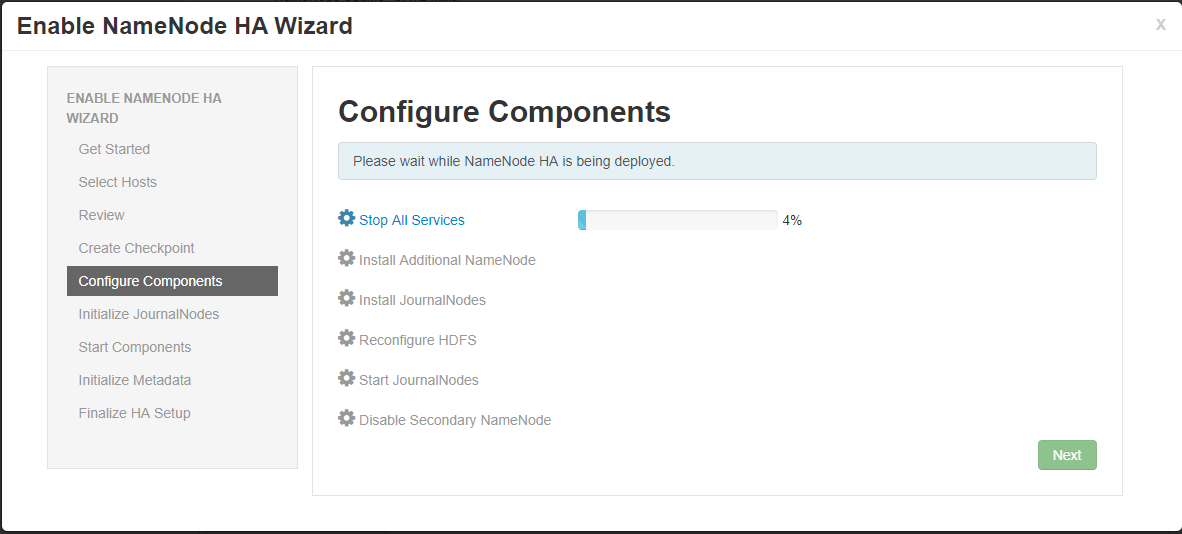
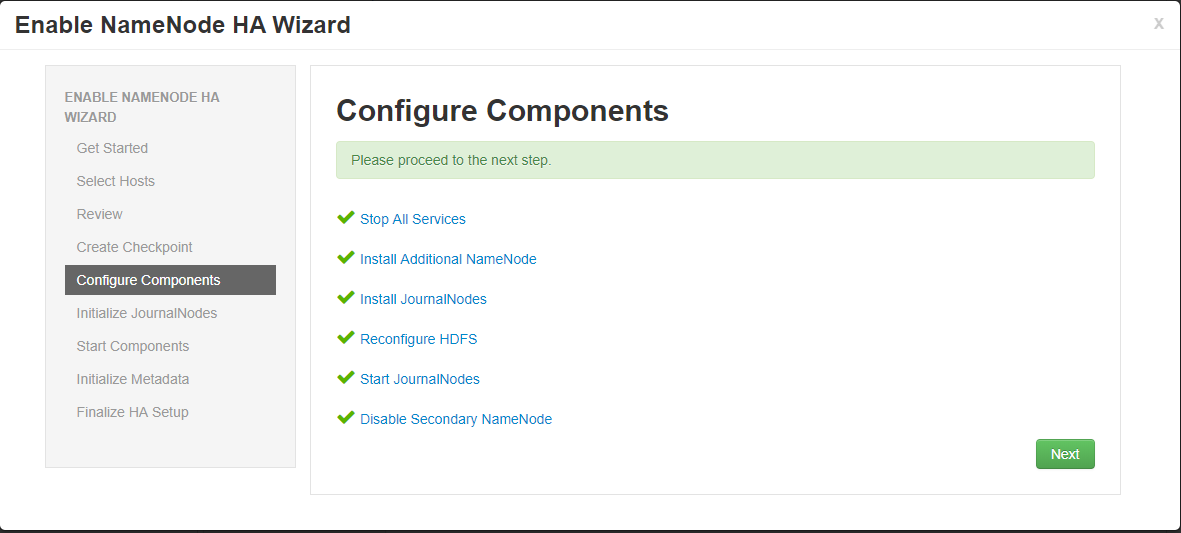
开始安装组件
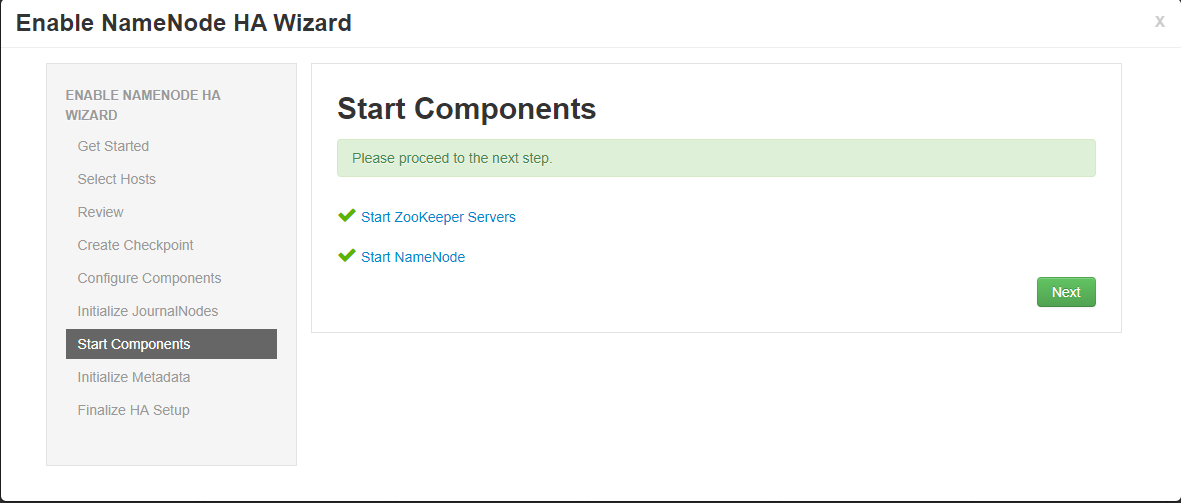
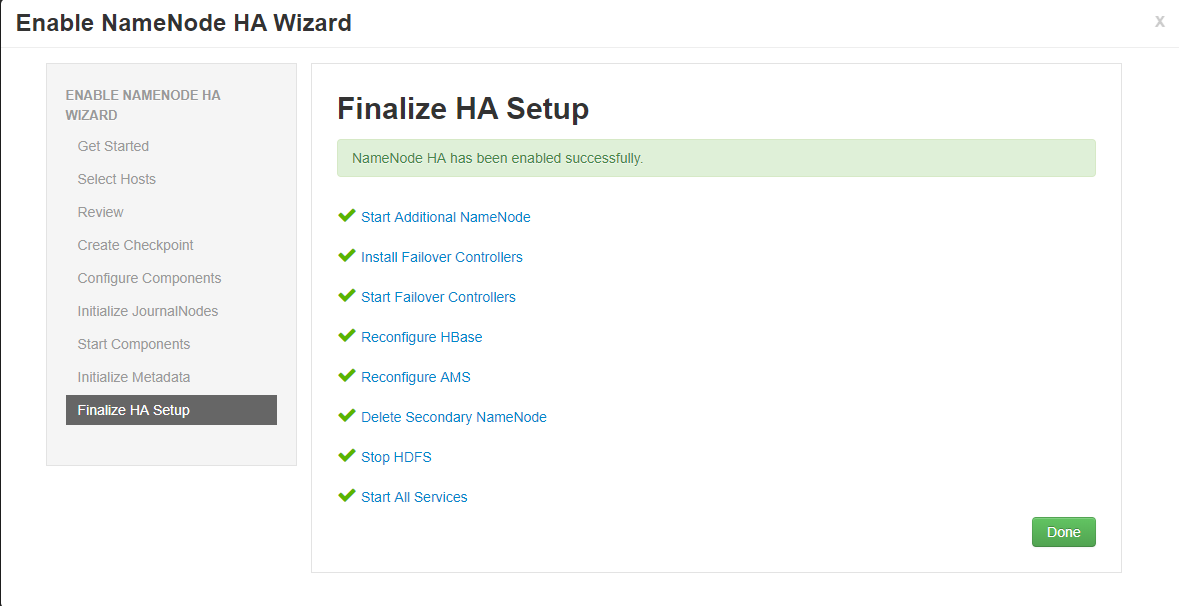
初始化组件
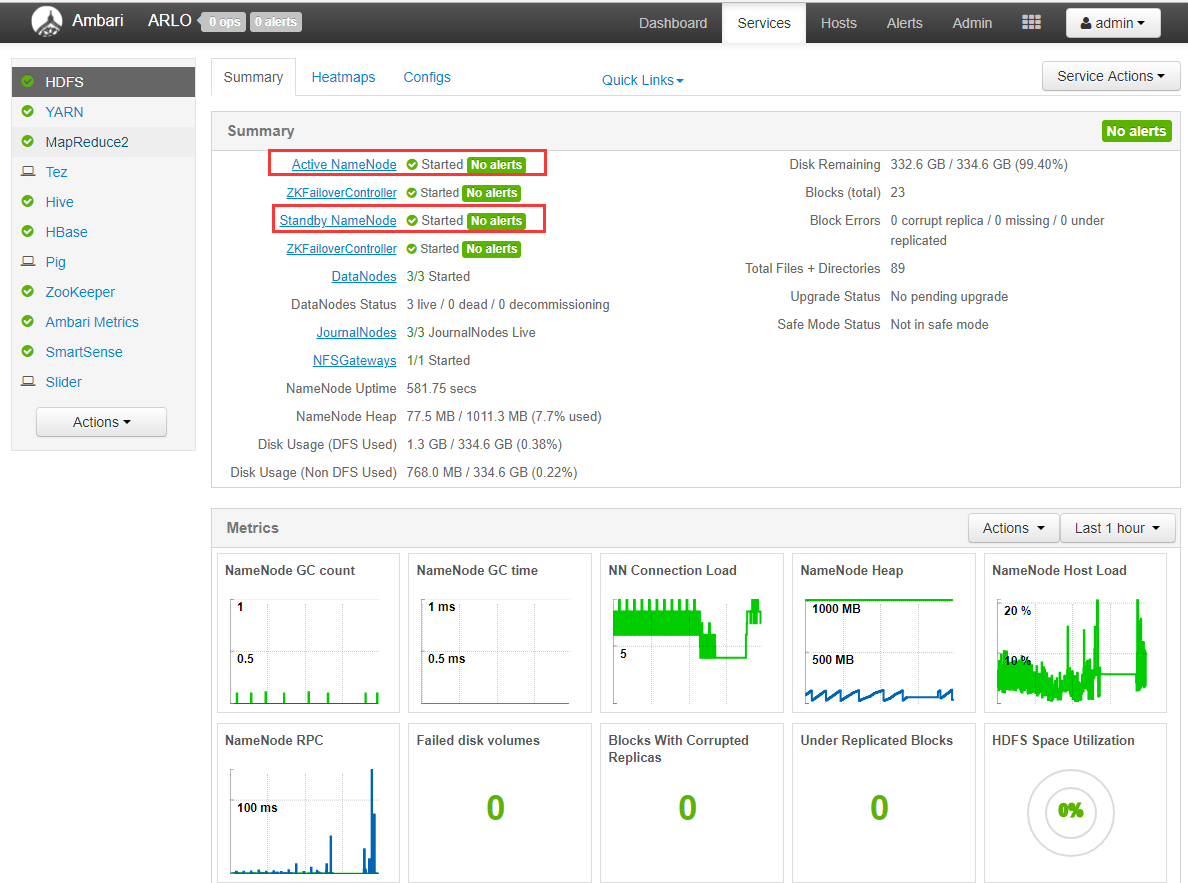
Namenode HA启用完成,如图所示
参考链接:http://www.cnblogs.com/zhijianliutang/articles/5195045.html https://blog.csdn.net/mawenwu1983/article/details/78983275 http://wiki.ttxit.com/display/hortonworks/Hortonworks https://www.ibm.com/developerworks/cn/opensource/os-cn-bigdata-ambari/index.html http://blog.51cto.com/hsbxxl/1981411