概述
NIS是Network Information Services (NIS server)的缩写,是为了管理一个网络中的用户账号 ,以方便用户在不同的主机上登录时只需要一个账号即可,它将用户的账号保存在一个主机上,用户登录时只需向其发送请求确认账号是否正确。
NIS 的主要功能:管理帐户信息
服务器端文件名 档案内容
/etc/passwd 提供用户账号、UID、GID、家目录所在、Shell 等等
/etc/group 提供群组数据以及 GID 的对应,还有该群组的加入人员
/etc/hosts 主机名与 IP 的对应,常用于 private IP 的主机名对应
/etc/services 每一种服务 (daemons) 所对应的埠口 (port number)
/etc/protocols 基础的 TCP/IP 封包协定,如 TCP, UDP, ICMP 等
/etc/rpc 每种 RPC 服务器所对应的程序号码
/var/yp/ypservers NIS 服务器所提供的数据库
NIS Server端配置
yp-tools :提供 NIS 相关的查寻指令功能。
ypbind :提供 NIS Client 端的设定软件。
ypserv :提供 NIS Server 端的设定软件。
rpcbind :就是 RPC ,系统一般会安装上。
安装NIS Server 端软件
1 | [root@sg010 ~]# yum -y install yp-tools ypbind ypserv rpcbind |
ypbind-1.20.4-33.el6.x86_64
yp-tools-2.9-12.el6.x86_64
ypserv-2.19-31.el6.x86_64
1 | [root@sg010 ~]# rpm -qa | grep rpcbind |
rpcbind-0.2.0-13.el6_9.x86_64
配置hosts文件
Hosts文件中之前的记录不要动,新增包含nis server 和 nis client 的主机与ip对应记录
1 | [[root@sg010 ~]# vim /etc/sysconfig/network |
配置nis服务
1 | [root@sg010 ~]# egrep -v '^$|#' /etc/ypserv.conf |
1 | [root@sg010 ~]# vim /etc/sysconfig/yppasswdd |
启动服务
启动后查看一下三个服务状态
1 | [root@sg010 ~]# /etc/init.d/rpcbind status |
rpcbind (pid 18813) is running…
1 | [root@sg010 ~]# /etc/init.d/ypserv status |
ypserv (pid 21054) is running…
1 | [root@sg010 ~]# /etc/init.d/yppasswdd status |
rpc.yppasswdd (pid 23087) is running…
并设置开机自启动
1 | [root@sg010 ~]# chkconfig --level 35 ypserv on |
添加用户,设置密码
[root@sg010 ~]# useradd -u 1001 nisuser1
[root@sg010 ~]# echo ffffff|passwd –stdin nisuser1
[root@sg010 ~]# /usr/lib64/yp/ypinit -m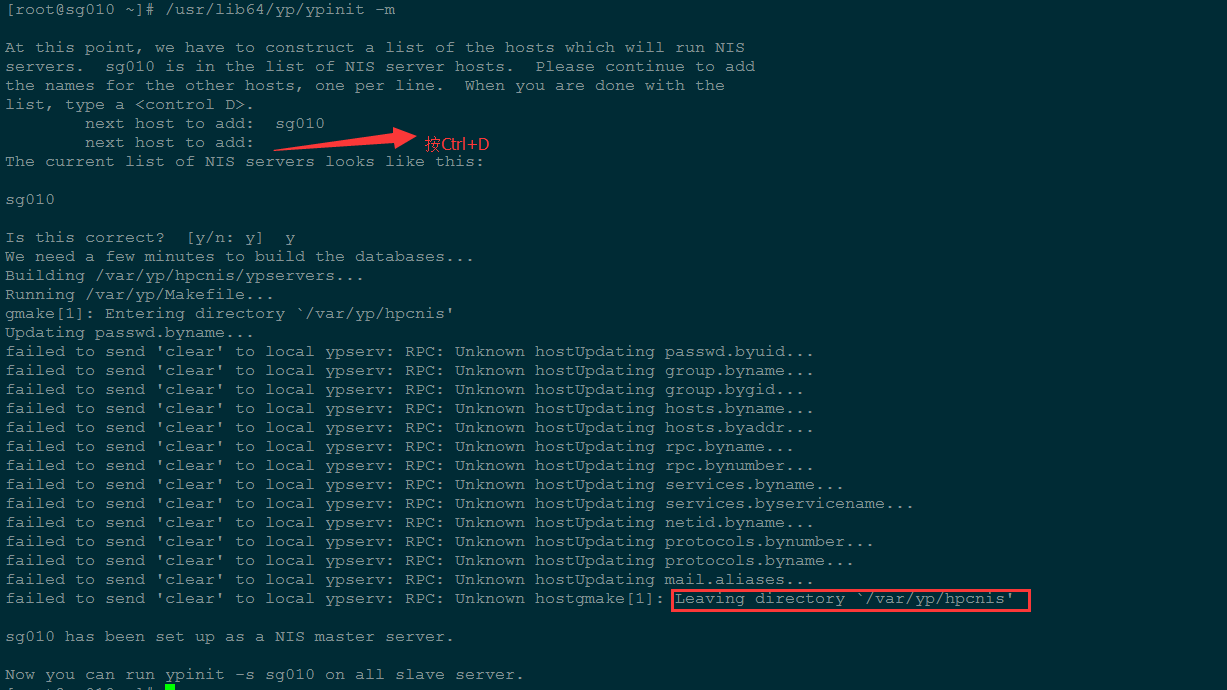
Client 端配置
[root@sg011 ~]# yum -y install ypbind yp-tools
[root@sg011 ~]# rpm -qa |grep ‘^yp’
yp-tools-2.9-12.el6.x86_64
ypbind-1.20.4-30.el6.x86_64
配置NIS
1 | [root@sg011 ~]# setup |
xshell 的配色方案修改过,所以这里看到的图片颜色也不是那种蓝底色的
勾选NIS,启用NIS验证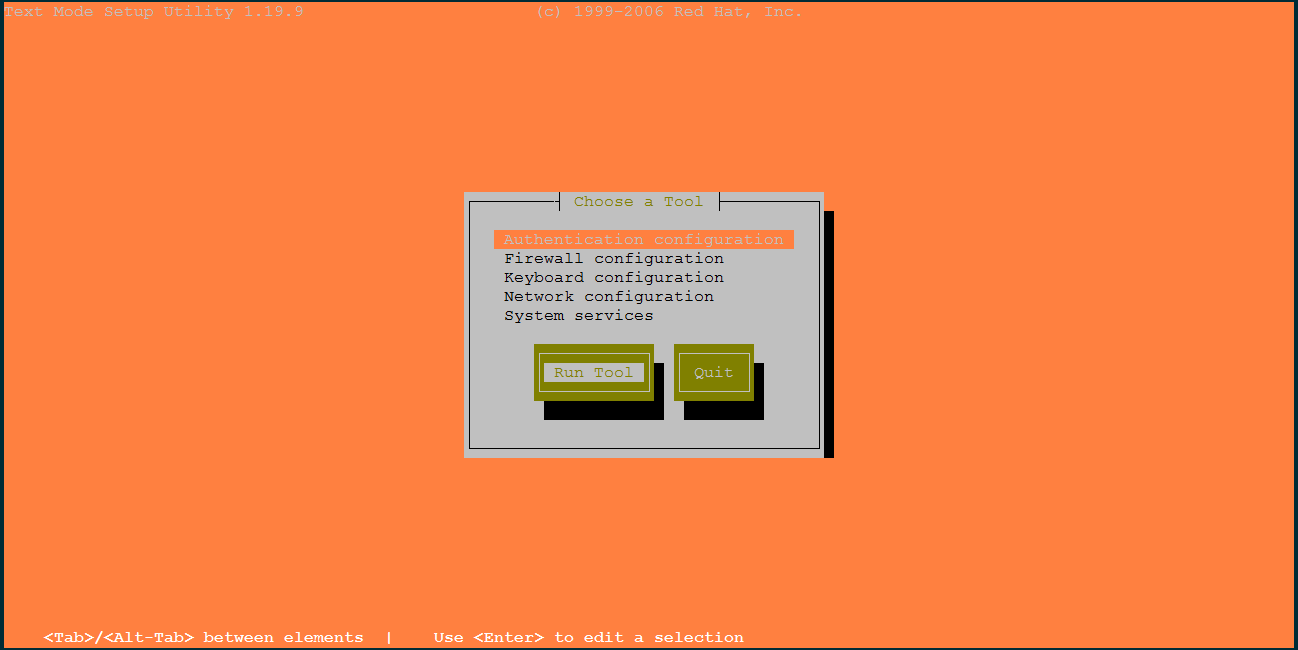
填写NIS的服务器域名和服务器地址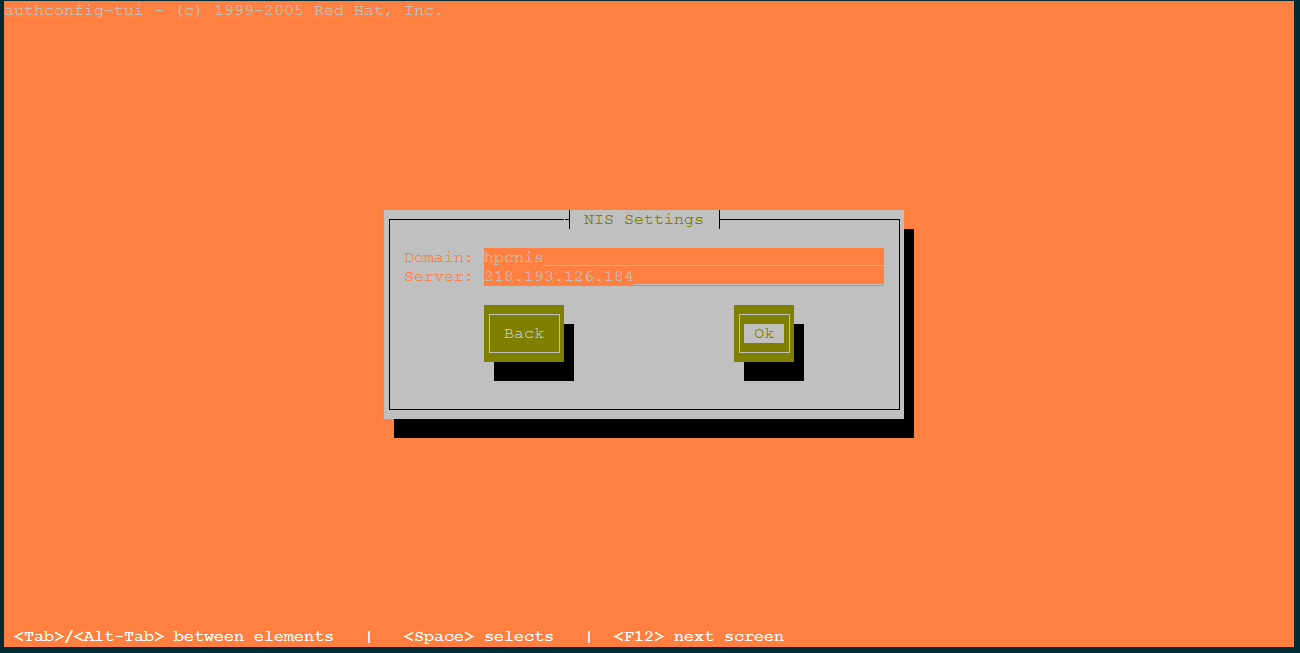
Starting rpcbind: [ OK ]
Starting NIS service: [ OK ]
Binding NIS service: . [ OK ]
刚才的步骤其实就是做了以下操作
- /etc/sysconfig/network (加入 NISDOMAIN 项目)
- /etc/yp.conf (亦即是 ypbind 的配置文件)
- /etc/nsswitch.conf (修改许多主机验证功能的顺序)
- /etc/sysconfig/authconfig (CentOS 的认证机制)
- /etc/pam.d/system-auth (许多登入所需要的 PAM 认证过程)
- 启动了rpcbind 和 ypbind服务
/etc/sysconfig/network

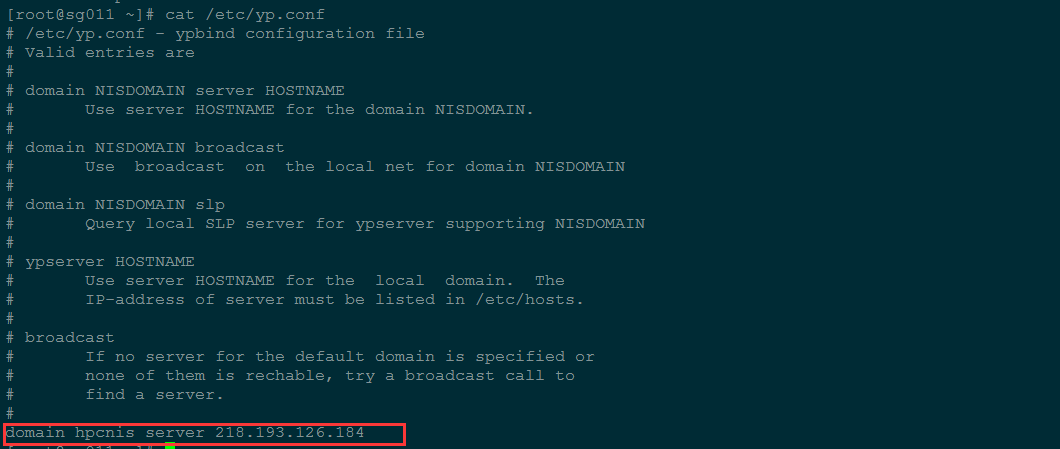
/etc/yp.conf
/etc/nsswitch.conf
主机验证顺序
1 | passwd: files nis |
/etc/sysconfig/authconfig
启用NIS
1 | USENIS=yes |
/etc/pam.d/system-auth
在pam验证过程中增加了nis
1 | password sufficient pam_unix.so sha512 shadow nis nullok try_first_pass use_authtok |
客户端简单粗暴的验证方法
切换用户验证
1 | [root@sg011 ~]# grep nisuser1 /etc/passwd |
su: warning: cannot change directory to /home/nisuser1: No such file or directory
-bash-4.1$
没有用户主目录
两种解决方式
- 新建一个/home/nisuser1目录,cp /etc/skel/* /home/niuser1
- 使用nfs,挂载nis server的home目录,客户端和服务器使用的是同一个用户目录,保持一致性(推荐)
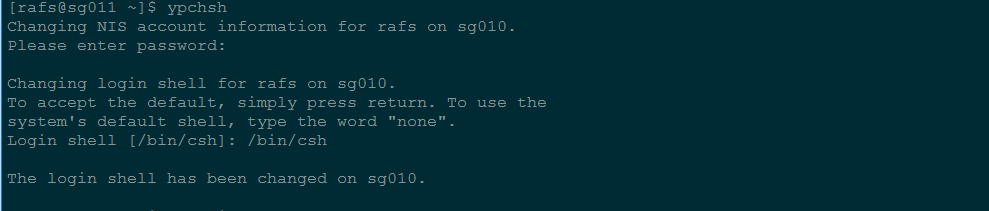
修改用户的默认shell
在客户端执行 ypchsh